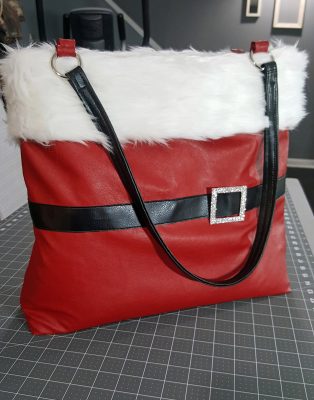
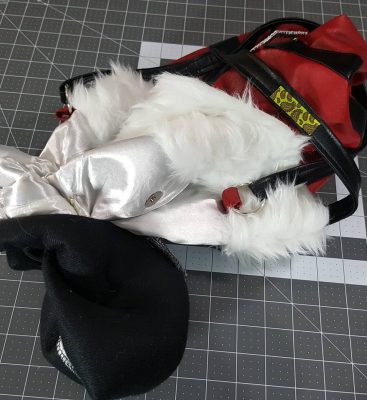
This Santa purse is my favorite make ever. It turned out better than I could have imagined when I was drawing out the pattern. Strangers literally stopped me wherever I went to ask me about it. Some of them even touched it…not even kidding. My only regret is not making it earlier in the season. Next year, I’ll carry it from Thanksgiving through New Years. This is a long post, but keep reading below to see the materials I used and the process, so you can make your own Santa purse and/or tote bag for the next holiday season. I’ll provide as many links as I can at the end. You can also view my time lapse video on YouTube here.
What You’ll Need
- Red faux leather
- Four-inch white fur trim
- Black faux leather
- Soft and Stable
- Fancy buckle
- O rings or D rings for straps
- Sewing clips
- White lining fabric
- Magnetic snap
- Medium to light interfacing
- Zipper for interior pocket – 7 inch (optional)
- Elastic for interior pocket (optional)
- Freezer paper for pattern
- Ruler
- Marking pen or chalk
- Rotary cutter of scissors
- Coordinating thread
- Heavy duty sewing needle (I used a leather needle)
Drawing Your Pattern
I began the Santa purse by drawing out the shape I wanted and writing out directions. It’s funny how you can see things so clearly in your head and then completely forget them later. Using my notes, I drew a pattern out of freezer paper. Typically, when you box the corners of a bag, your bag bottom becomes smaller than the top. I wanted this bag to be fairly straight from bottom to top because of the fur trim.
The pattern starts out as a rectangle, 20 inches wide by 17 inches tall. Squares are then cut out of each bottom corner, two inches by two inches. Next, mark two inches in from each top corner. Draw a line from the edge of each bottom corner to the marks, creating a diagonal line. Cutting along that line makes the top of the bag pattern smaller than the bottom. Measure down, about 6 or 7 inches, from the top of the pattern and draw lines for the belt placement. The size of your buckle will determine the width of these lines.
Starting to Cut
Lay your faux leather, face up, on your cutting surface. Place your pattern and cut. This Telio faux leather is the best faux leather I’ve used. You hear a lot of people saying that certain fabrics sew like a dream. Now I know what they mean, because this certainly does. Mark the belt placement on the wrong side of the faux leather, making two small marks on each side. Cut a second piece from the faux leather and then two more pieces each from your lining fabric, interfacing, and the Soft and Stable.
At this point you will also want to cut your material for the straps, belt, tabs, and interior pockets, if you choose to add them. Your belt should be cut in the length and width of your lines on the pattern piece. Cut 4 tabs to attach the straps. I usually cut these approximately twice the width of the rings, because you will fold these in half when sewing them together. Length is 6 to 8 inches. The straps are also twice the width of your rings. Strap length will be twice as long as you want want the finished straps.
If you decide to add the interior pockets, you will cut two pieces for the zipper pocket. The length can be as long as you want, but not so long that it will get caught in the bottom of the bag after the corners are boxed. Width should be three inches longer than your zipper.
For the elastic top pocket, I measured my cell phone. This is the pocket I use for it in all my bags. I cut the fabric and inch and a half bigger than the width of my phone and twice as long because I fold it in half when sewing.
Putting Your Bag Together
When assembling the bag, I did it a bit out of order. I tried to group everything according to thread color to avoid changing out the thread in my machine numerous times. Using white thread, black thread, and red thread, began with black for the straps.
Straps
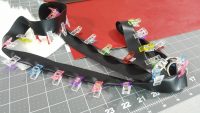
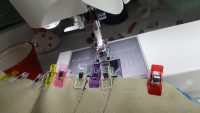
To create the straps, begin by drawing a line down the center of the length. Slide two of the rings onto the straps. Take the short ends, and put right sides together. Stitch closed. Open the same the seam, and stitch it open on the right side of the strap. Turn strap back over with wrong side up. Fold each side in toward the center line drawn, and secure as you go using the sewing clips. Turn strap back over with right side up. Stitch two-eighths from folded side, removing clips as you go.
When you have sewn the length of each side, flatten the strap with a ring at each side. Flattening the strap will sandwich the folded sides in between the two layers. Secure the flattened strip with clips. Sew down the previously sewn stitching line on each side securing the strap together. Do the same for the other strap.
Belt
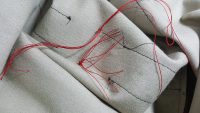
Place two-sided tape on the back of the black belt piece. Position the buckle where you would like it. I put mine slightly off center on the front of the bag. Place each belt piece into position, and topstitch to the bag exterior. Switch to white thread.
Interior and Pockets
Prepare the elastic pocket by folding it in half, stitching around, and leaving a small space open for turning. Turn the pocket, and stitch the opening closed. Next, fold over the top of the pocket in a width slightly wider than your 1/4 inch elastic. Top stitch creating a channel, and insert the elastic. Stitch the end of the elastic to the end of the pocket. Pull the elastic, gathering the top of the pocket until it is the desired length. Set aside.
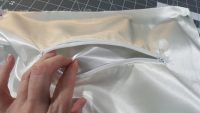
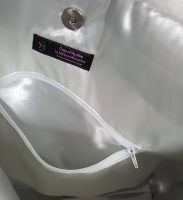
Apply the medium to light interfacing on the back of the interior fabric. Next, insert the zipper pocket into the one side of the lining fabric. I’ll do a separate post later on how to put in a zipper pocket. The actual process is not long, but the explanation is lengthy.
The next step is attaching your Soft and Stable to the back of each piece of interfaced lining fabric by sewing all the way around. At this point, you will attach your elastic-topped pocket to the other lining piece. We wait to attach the pocket until this point to give the pocket the added stability of the Soft and Stable. I have a heavy cell phone, so a silky lining fabric is not strong enough by itself to keep the pocket attached. Yes, I speak from experience.;-) You should also attach any personalized labels to your lining fabric.
Place your interior pieces right sides together, sew, and box the corners. Leave a wide opening in the bottom of the lining for turning the bag. You will want to keep this fairly big, because it is difficult to turn a faux leather bag. The buckle is also a challenge, so you want to make sure you have enough room. Center and place your magnetic snap about two inches from the top of the bag. I will combine an easy way to do this along with the zipper post at a later date. Turn your interior right side out.
Faux Fur Trim
Set aside your interior, and grab your exterior pieces. Lay your faux fur upside down along the top of your exterior piece and trace the angle of the sides onto the back of the faux fur. Using small scissors, carefully cut along the lines. You do not want to cut the fur, only the backing. Turn the fur back over, and use your sewing clips to attach it to the top of the exterior piece. Stitch along the very edge of the top, attaching it to the exterior. I also stitched it along the both sides. That makes it easier when sewing the exterior pieces together. The bottom portion remains unattached. Now, switch out your thread to red.
Exterior Pieces and Tabs
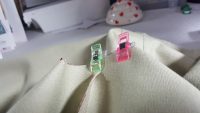
Place your two exterior pieces, with the faux fur already attached, right sides together. Use your sewing clips to keep it from sliding around. Stitch together, and box the corners. Set aside.
Take your tab pieces and fold in half lengthwise. Stitch down the length of all four, and turn. On these, you will want to grade your seams. You want as little bulk as possible in side of them. Fold one in half with the seam on the inside of the fold. Slip the tab through the ring of your bag straps. Do the same for the other three, securing all with two clips.
Next, take your bag interior, turned right side out, and position your combined tabs and straps where you would like your bag handles. I like mine two to three inches in from the side of the bag. You will place the tab/strap upside down with the open end of the tabs sticking out above the top of the bag. There should be about an inch of tab between the top of the bag and the ring. Stitch across the tab, very close to the edge of the bag. Do this on all four tabs. Stitching them in place keeps everything from moving when you are sewing the top of the bag.
Attaching Interior and Exterior
Finally, it is time for the final steps. You should only have two pieces left…your interior with right side facing out and straps attached and exterior with the wrong side facing out. The bag will still look a mess at this point. That is what I love about bags. They look terrible right up until they are turned. Take your interior and put it inside the exterior. The rights sides should be together with the straps sandwiched in between. Match all seams along the top and secure with sewing clips. Then stitch all the way around the top of the bag. Be very careful going over the tabs. There is a lot of bulk there. I broke two needles because I wasn’t sewing slow enough.
Turning the Bag
After sewing the top, it’s time to turn. I cannot stress this enough. DO THIS SLOWLY AND CAREFULLY. The buckle will get caught and you do not want it to tear your faux leather. Reach through and pull the bag through the opening that you left in the lining. I stopped a number of times to check the buckle and make sure it wasn’t caught or tearing the belt portion.
Once you have the bag complete through, you will switch back to white thread and stitch the lining opening closed. Then stuff the lining back into the the bag exterior. Take some time and make sure everything is pushed into the appropriate corners. And you’re done!
Some Afterthoughts
If you’ve made it this far, thanks so much for reading. In hindsight, I wish I would have spent some additional money and got a really luxurious faux fur. The link below is the one I used and it looks great. However, the buckle and Telio faux leather are spectacular. They really look expensive. Combined, they make the fur look a little cheap.
It took me two days to make this bag, because I went very slow. I wanted this bag to be amazing, and it certainly met all of my expectations. If you have a moment, please share my time lapse video from my YouTube channel.
Cheers!
Links and information on materials:
Just a disclaimer, some of these are associate links. I may receive a small amount of compensation if you purchase through these links. All opinions are my own, and I would definitely not recommend any of these items if I was not completely satisfied with using them.
Rhinestone Buckle
Red Faux Leather
White Faux Fur
Soft and Stable
Sewing Clips
Black Faux Leather is from Joann Fabrics, as is the white silky interior fabric. Both were purchased at my local Joann Fabrics.
One inch steel rings were purchased on Etsy.




















No Comments