At long last, my budget bathroom remodel….in detail. This my friends was THE most difficult thing I have ever done in my life. Getting divorced was easier. I bought my house in 2013 from an estate. It was built in 1957 and I am only the second owner. The cute little lady who passed away, smoked like a chimney in here her entire life. No matter how much cleaning, everything in the house that had not been painted had a yellowish tinge to it. That included every surface in the bathroom. I lived with it until the tiles began falling down in the bathroom on Good Friday this past year. Then my temper kicked in and out came the hammer. My poor dad and his wife spent the next ten or so days helping remove the old tub and installing the new one along with surround. Then I spent the next five months working a little at a time on the rest of it…naturally calling my dad when I got myself into trouble (which may or may not have been often, I will admit nothing). I am absolutely in love with it, but it was tough going.
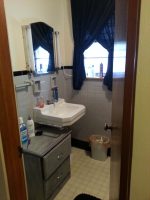
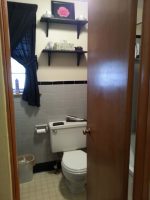
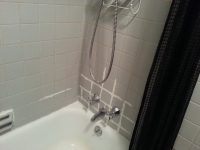
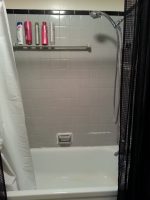
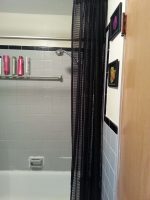
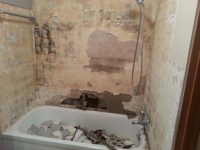
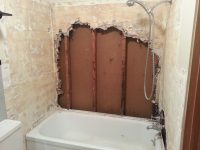
The loveliness you see above started with frightening beginnings. Here is what we started with and what was underneath the tile.
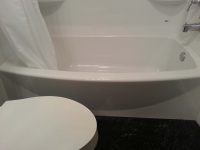
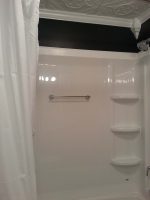
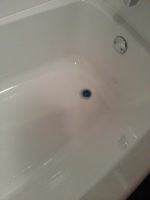
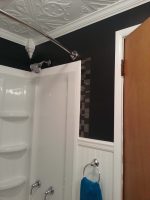
The tub was by far the most difficult part. The old tub was smaller than the standard 60 inches, so the geniuses who built my house decided to bring the wall out to meet it. This made getting a standard sized tub extraordinarily difficult to get in…especially the one I chose. There was fiberglass cutting, much swearing that I’m certain my dad does not think I remember, and the new tub spent at least a night in every room of my house…including my bedroom. There was also no sub-floor beneath the old tub or any insulation behind the old cement board on the walls. So my dad had to put in a new floor and we insulated the walls before putting up the new cement board. It was rough, but once it was in, it was undeniably beautiful.
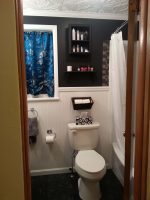
From here, I started diving in myself. The next part I worked on was the floor and toilet. Once I removed the toilet and the old nasty three layers of linoleum flooring, I realized the sub-floor around the toilet was totally water damaged. So I ripped it out. I cut out a new piece of plywood and braced up the new part of the floor with some help from my dad, and then put down a skim coat. Then I primed and put down some peel and stick tiles with a little liquid nails to ensure adhesion. The next day my dad helped me set the new toilet.
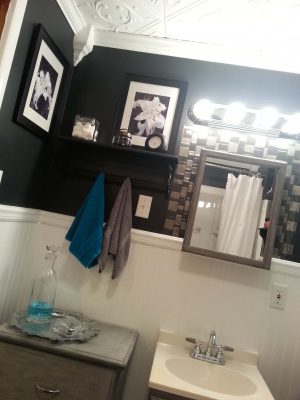
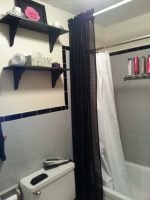
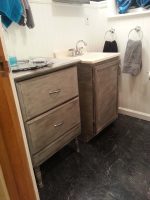
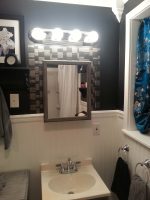
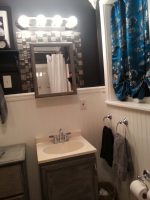
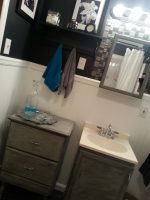
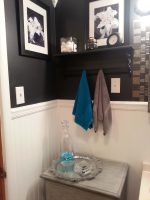
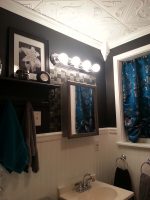
I also put up the wainscoting behind the toilet to save myself a lot of trouble later. The electric was next. Previously, the only outlet in the bathroom was in the old ugly mirror with lights attached to the side. Not GFCI to say the least. I pulled out the old mirror and added new boxes for and installed the light fixture, GFCI outlet, and light switch for the light fixture….all by myself. Then I braced the old opening and put up the new, surface-mount medicine cabinet. My dad gave me that along with the little vanity and faucet. I painted both with gray chalk paint and then dry-brushed black over it to match the nightstand I had painted like that previously. I also added legs to the nightstand to give it a more sophisticated furniture look. I added faux tile around the mirror to hide the bad wall where the old lights were. I carried the faux tile over to shower as well. Did I mention the paint color is called “Nightclub”? I love it!
After that, I pulled out the wall mounted sink and finished putting up the wainscoting. I also installed the vanity. The plumbing was a nightmare and I almost had to call my dad. But eventually I figured it out and emerged victorious.
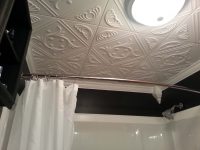
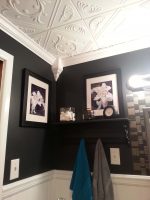
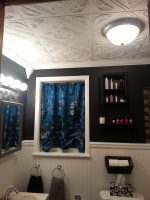
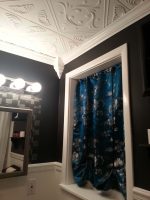
The rest of the bathroom was pretty much cosmetic, but still not for the faint of heart. I now own two nail guns, an air compressor, and a compound sliding miter saw. I did all the trim, chair rail, and crown moulding you see. And let me tell you, crown moulding is no joke. There were definitely tears on that, hence the corner blocks. lol I spent an entire day trying to cope the corners only to rip it down. The ceiling is actually styrofoam tiles. I painted each one individually before attaching it to the ceiling. Then I caulked the seams.
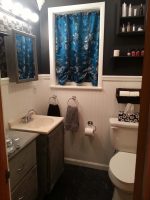
And here’s the fun stuff and the rest of the pictures. The shelf above the toilet is part of one my dad gave me a couple of years ago. I knocked off this heart cut-out thingy and painted the shelf. The one above that I made out of extra wood and picture frame after seeing a tutorial on Pinterest. I LOVE Pinterest. The shelf with the hooks above the former nightstand was a thrift store score. It was too big for the space so I took it apart, cut it down, and then put it back together and painted it. On top of that and on the one wall, you’ll see my oriental lily pictures. I actually grew these along the side of my house from bulbs I bought on Amazon. I photographed them the day before a terrible storm and all the leaves came off. Also on the shelf is an old clock I had that I painted with chalk paint, a glass jar that used to hold a soy candle and is now home to my hair ties, and another thrifted glass container for cotton balls.
On top of the former night stand is a beautiful (and heavy) silver serving tray I picked up at the Goodwill store, another thrifted glass container, and a wine decanter that holds mouthwash. I’ve since switched out the decanter for a repurposed bourbon bottle. The window shade I made from a beautiful silk brocade I picked up at Joann Fabric.
A long post for a long process. This was really a learning experience. And yes it took me months, but it literally saved me thousands of dollars. I love how it turned out. And this my friends was definitely celebrated with wine. 🙂



2 Comments
Farmhouse Bathroom Remodel - Days of My Wine and Mellynn Designs
August 7, 2017 at 9:25 pm[…] both my upstairs and basement bathrooms would have to be completely remodeled. I started with the upstairs bathroom because it seemed like it would be something I could do myself. And when I say myself, I really […]
My Magical Patio - Days of My Wine
March 13, 2022 at 3:10 pm[…] I called my dad and said, “Hey, what are you doing this weekend?” That’s how the upstairs bathroom remodel began. My second call was to Kraus’s Department Store. Since I was using pavers, I knew we […]